This article covers the “Manage Azure Active Directory (AD)” section of the AZ-100 and AZ-103 Exams and is part of my AZ-100 Study Notes series.
Some features in this module will require at least an active “Enterprise Mobility + Security E5” licence and a “Azure AD Premium P2” trial in order to actually try yourself. These can be activated via notifications on features that require them or by searching for the licences + trial which will take you to pages to set up trials.
Add custom domains
Every Azure AD tenant comes with a default domain in the format *domainName*.onmicrosoft.com, although the default cannot be changed, it is possible to add new domains.
To add a custom domain to AAD, navigate to Azure Active Directory and then select “Custom domain names” in the “Manage” menu. You can then click “Add custom domain” and specify the new domain to add.
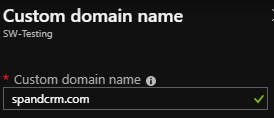
Once you click “Add Domain” you will be taken to a page which provides a TXT or MX record which must be set up on the DNS provider for your domain. Once that’s done click Verify and the domain will be added.

More information on this can be found at – https://docs.microsoft.com/en-us/azure/active-directory/fundamentals/add-custom-domain#add-your-custom-domain-name-to-azure-ad
Configure Azure AD Identity Protection, Azure AD Join, and Enterprise State Roaming
Azure AD Identity Protection
Azure AD Identity Protection provides an overview of flagged users and risks detected using Azure machine learning algorithms and allows you to set conditional access policies to protect users.
To configure AAD Identity Protection –
- Search for “Azure AD Identity Protection”
- Click “Onboard” in the “Settings” menu and then select the directory to associate and click “Create”.
Azure AD Premium P2 is required to use AAD Identity Protection.
More information on this can be found at – https://docs.microsoft.com/en-gb/azure/active-directory/identity-protection/enable
Azure AD Join
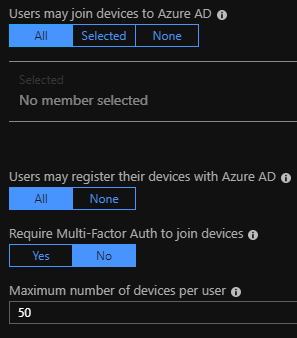
To configure Azure AD Join navigate to AAD then select “Devices” in the “Manage” menu. Then select “Device Settings” which will allow you to configure various setting for joining devices to AAD.
More detailed information on how to set up various things can be found at – https://docs.microsoft.com/en-us/azure/active-directory/devices/device-management-azure-portal
Enterprise State Roaming
Enterprise State Roaming is configured in the Devices menu as covered above.
Detailed information on this can be found at – https://docs.microsoft.com/en-us/azure/active-directory/devices/enterprise-state-roaming-enable
Configure self-service password reset
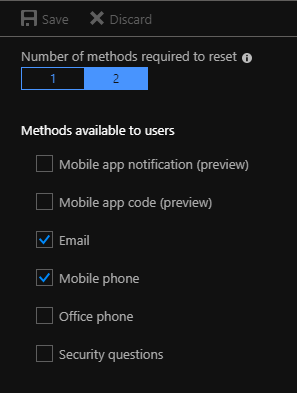
To configure Self-Service password resets you can navigate to AAD then select “Password reset” in the “Manage” menu.
From here you can enable SSPR for none, selected or all users.
You can also configure various required authentication methods and enforce the number of methods required before allowing a reset.
More information on this can be found at – https://docs.microsoft.com/en-us/azure/active-directory/authentication/quickstart-sspr and at https://docs.microsoft.com/en-us/azure/active-directory/authentication/concept-sspr-howitworks
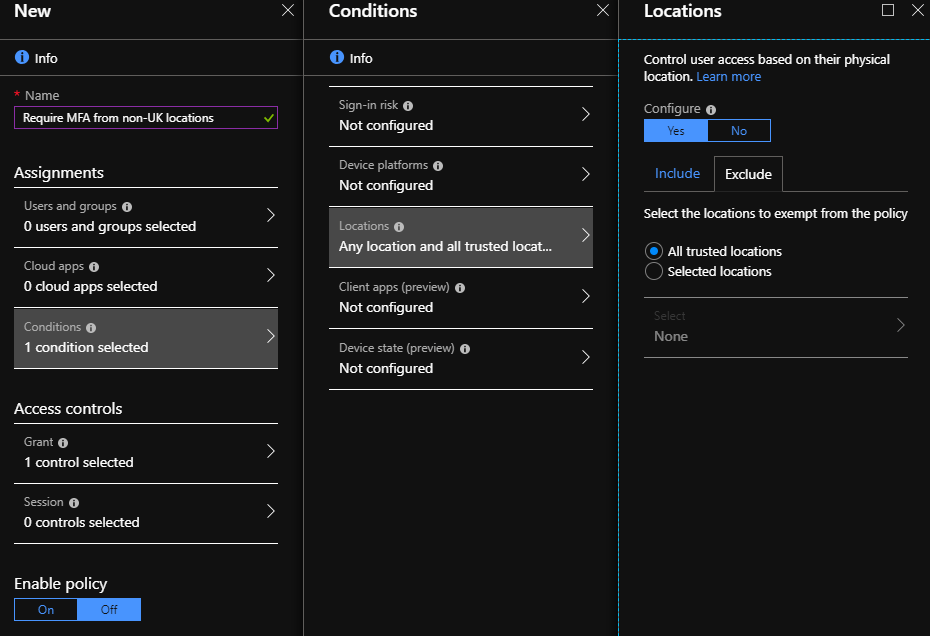
Implement conditional access policies
A common best practice is to enable Multi-Factor Authentication when logging in or connecting from an untrusted network, this is what conditional access policies facilitates.
Conditional Access uses the concept of “Named Locations” as trusted locations in order to identity untrusted networks. These are configured within Conditional Access by selecting “Named locations” in the “Manage” menu and are defined as either IP ranges or Countries/Regions.

More information on this can be found at – https://docs.microsoft.com/en-gb/azure/active-directory/conditional-access/untrusted-networks
Manage multiple directories
To create a new directory (AAD tenant) select “create a resource” then search for “Azure Active Directory” then click Create. From here, define an Organization name, and an Initial domain name which will serve as the base domain for the new instance and select a location.

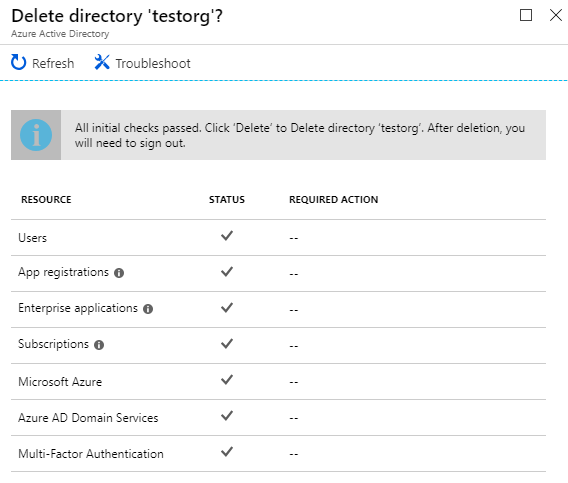
Deleting a tenant requires quite a bit more effort, and the following requirements must be met –
- There can be no users in the tenant except one global administrator.
- There can be no applications in the tenant.
- There can be no multi-factor authentication providers linked to the tenant.
- There can be no subscriptions for any Microsoft Online Services such as Microsoft Azure, Office 365, or Azure AD Premium associated with the tenant.
To delete a tenant –
- Navigate to the tenant/directory you want to delete.
- Navigate to Azure Active Directory and select “Delete directory” in the overview.
- Azure will now perform various checks and inform you whether you can delete the tenant or if you’re required to perform further actions. Some checks will require a refresh of the browser window before they will pass if they’ve previously failed.
- Click Delete.
The Microsoft documentation is fairly sparse on this with a lot of the links I’ve found on various other blogs no longer pointing to anything of use due to a recent rewrite of the documentation it seems. The link below is worth looking at for an overview though – https://docs.microsoft.com/en-us/azure/active-directory/fundamentals/active-directory-whatis
This goes over creation of new directories – https://docs.microsoft.com/en-us/power-bi/developer/create-an-azure-active-directory-tenant
Perform an access review
Depending on what you specifically want to review you will do it in either Azure AD Access Reviews, Azure AD Enterprise Apps or Azure AD PIM –
| Access rights of users | Reviewers can be | Review created in | Reviewer experience |
|---|---|---|---|
| Security group members Office group members | Specified reviewers Group owners Self review | Azure AD access reviews Azure AD groups | Access panel |
| Assigned to a connected app | Specified reviewers Self review | Azure AD access reviews Azure AD enterprise apps (in preview) | Access panel |
| Azure AD role | Specified reviewers Self review | Azure AD PIM | Azure portal |
| Azure resource role | Specified reviewers Self review | Azure AD PIM | Azure portal |
To enable Access Reviews –
- Navigate to “All services” and search for “Access reviews”.
- Select “Onboard” in the “Access reviews” menu.
- Click “Onboard Now” in the next page.
To create an Access Review –
- Once access reviews are onboarded, navigate back to it and select “Access reviews” in the “Access reviews” menu.
- Select “New access review”.
- Provide a name and start date.
- Provide a frequency to run the review, defaults to One Time.
- If a frequency is selected provide a duration and when to end it by.
- Select the Application or Group to review.
- Click Start.
- The review will now run and be set to the “Starting” status.
- Once it changes to “Active” you can view results by selecting the review.
There is a very detailed doc on this at – https://docs.microsoft.com/en-gb/azure/active-directory/governance/access-reviews-overview


Leave a comment