This article covers the “Manage Azure AD objects (users, groups, and devices)” section of the AZ-100 and AZ-103 Exams and is part of my AZ-100 Study Notes series.
Create users and groups
Creating users and groups is fairly straightforward, navigate to Azure Active Directory and then select either Users or Groups as required.
To create users –
- Select “New users”
- Provide the name and the username you want the user to have.
- Provide the Profile details which are first and last name, job title and department.
- Select any groups the user should be a part of.
- Select the Directory Role, which is either standard user, global administrator or limited administrator.
- Finally, click Create to create the new user.

More information on User management can be found at – https://docs.microsoft.com/en-us/azure/active-directory/fundamentals/add-users-azure-active-directory
To create a group –
- Select “New group”
- Select the Group type –
- Security – Used to provide permissions to various resources based on a single group.
- Office 365 – An office group used to promote collaboration between members, creates a shared mailbox, calendar, SharePoint site and other various elements.
- Provide a name and a description for the group.
- Select a Membership type –
- Assigned – Allows you to specify members directly
- Dynamic User – Allows you to define rules that control user membership
- Dynamic Device – Allows you to define rules that control device membership
- Provide the users or rules for the group then click Create.
More information on this can be found at – https://docs.microsoft.com/en-us/azure/active-directory/fundamentals/active-directory-groups-create-azure-portal
Manage user and group properties
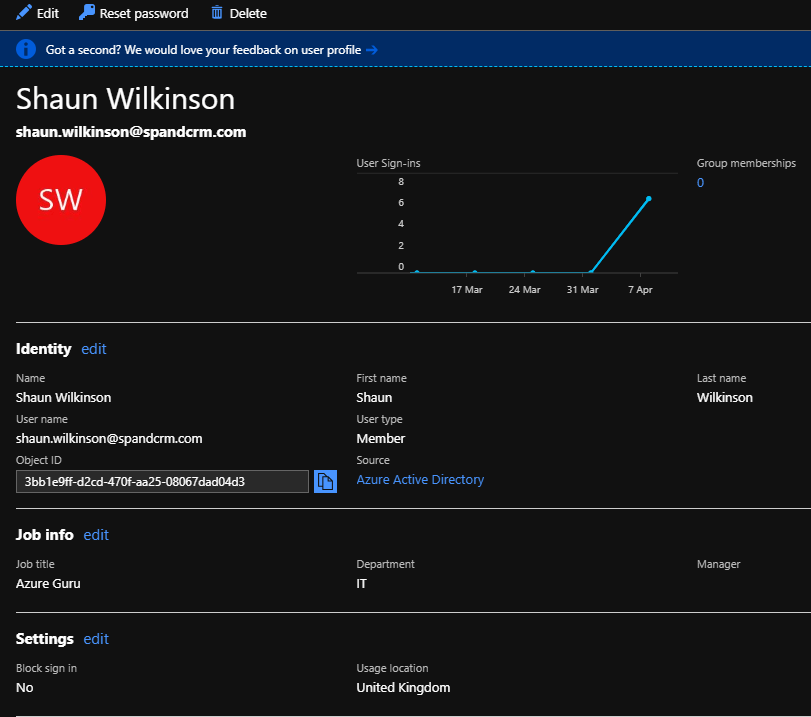
Individual user properties are managed by navigating to AAD and then selecting Users and then selecting an individual user. You can then select “Edit” in the ribbon to modify any of the available properties of the user. From this page you can also disable sign in for the user.

More information on this can be found at – https://docs.microsoft.com/en-us/azure/active-directory/fundamentals/active-directory-users-profile-azure-portal
Group properties may be managed by navigating to AAD then Groups and finally by selecting “Properties”. From here you can change the name, description and membership type.
More detailed info can be found at – https://docs.microsoft.com/en-us/azure/active-directory/fundamentals/active-directory-groups-settings-azure-portal
Manage device settings
To manage device settings in Azure, first navigate to Azure Active Directory then select “Devices” in the “Manage” menu, then select “Device settings”.
You can manage the following settings –
- Users may join devices to Azure AD
- Allows you to select what users may join their device using Azure AD Join.
- Additional local administrators on Azure AD joined devices
- Allows you to configure users that will be local administrators on any joined devices, global admins are granted this right by default.
- Users may register their devices with Azure AD
- Allows devices to be registered with Azure AD.
- Require multi-factor auth to join devices
- Enforces multi-factor authentication during the join process if enabled.
- Maximum number of devices
- The maximum amount of devices that may be registered to a single user.
More information can be found at – https://docs.microsoft.com/en-gb/azure/active-directory/devices/device-management-azure-portal
Perform bulk user updates
Bulk edits of users doesn’t appear to be supported in the Azure portal but is possible through the use of PowerShell and the Azure module.
The example below will connect to AAD, find any users with a Street Address equal to “44 Simpson Shores” and then update the address of each user to a new one.
#Installes the Azure module for managing AAD
Install-Module AzureAD

#Connect to Azure, can leave off the tenant ID if you only have one
Connect-AzureAD -TenantId ff359c74-55f6-46b7-a505-ee28d198fbd7

# Select all users living in "Simpson Shores"
$returnedUsers = $Users | Where-Object -Property StreetAddress -eq "44 Simpson Shores"

#Loop through them and update the street address
foreach($user in $returnedUsers) {
    Set-AzureADUser -objectId $user.ObjectId -StreetAddress "46 Simpson Lane" -State "South Charlieside" -PostalCode "B68 8PE"
}

#Display the users again to show the change
Get-AzureADUser | select displayname, UserPrincipalName, JobTitle, StreetAddress, State, City, PostalCode, Country | Format-Table
You can however bulk-update users using the Office 365 Admin portal by navigating to Users > Active Users and selecting more than one user before selecting “Edit contact information”.


Leave a comment