
In this post, I’ll show you how to apply Azure Reservations to significantly reduce your cloud costs. Azure Reservations allow you to prepay for services, locking in lower rates and achieving large savings over pay-as-you-go pricing. This is particularly useful for resources that you know will be in use for extended periods.
This post is part of my Azure Cost-Saving Series. For more tips on reducing your Azure costs, check out the full series here: Sysadmin Central – Cost Saving Series.
What Are Azure Reservations?
Azure Reservations are a way to save money on your resource costs by committing to use Azure resources for a one to five-year term. By making this commitment, you can save up to 72% compared to pay-as-you-go pricing. Reservations are available for several Azure services, including Virtual Machines, SQL Databases, and more as shown in the image below.

- How It Works: When you purchase a reservation, you commit to using a specific resource type in a particular region at a specific capacity. In return, Microsoft offers a often significant discount for the commitment period. The reservation applies automatically to matching resources in your subscription, reducing your overall costs.
- Benefits: Reservations are ideal for workloads that run consistently, such as production environments, databases, and long-term projects.
Determining Which Resources to Reserve
Before purchasing reservations, it’s crucial to analyze your usage patterns to determine which resources would benefit most from reservations. Here’s how to do it:
Step 1: Analyze Your Usage Patterns
Use Azure Cost Management + Billing to review your current resource usage. Focus on resources that are consistently used and have predictable demand. Resources that run 24/7 or are part of critical infrastructure are prime candidates for reservations.
Step 2: Use Azure Advisor to Identify Reservation Opportunities
Azure Advisor is a built-in tool that provides personalized recommendations to optimize your Azure resources. It can help you identify which resources are good candidates for reservations:
- How to Access Azure Advisor:
- In the Azure Portal, search for “Advisor” in the top search bar.
- Navigate to the “Cost” tab. Here, Azure Advisor will display recommendations for resources that could benefit from reservations based on your historical usage patterns.

- Reviewing Recommendations:
- Azure Advisor will suggest reservations for VMs, SQL Databases, and other eligible resources that have high utilization. It will also provide estimated cost savings, helping you make informed decisions.
- It is important to consider each reservation individually, Advisor can and does make mistakes and it cannot know whether your organisation plans to deprecate a resource or whether capacity requirements may reduce in the near future.
Step 3: Leverage the Reservations Pane to Explore Options
The Reservations pane in Azure allows you to explore reservation options based on your resource utilization. The pane provides details like the recommended term (one or three years) and the expected savings, helping you to easily identify the best reservation opportunities for your environment.
- How to Use the Reservations Pane:
- Navigate to the “Reservations” page in the Azure Portal.
- Select the type of resource to search for Reservations.
- Change the Scope and Billing Subscription if required.
- Reviewing Recommendations:
- The pane provides details like the recommended term (one or three years) and the expected savings, helping you to easily identify the best reservation opportunities for your environment.
Step 4: Consider the Term Length
Although a three-year term provides deeper discounts, it’s important to consider the stability and longevity of your workloads. If you’re confident that a workload will remain stable, a three-year reservation can provide maximum savings. Otherwise, a one-year term offers more flexibility and can often be worth the reduced discount to allow greater flexibility.
If we take a fairly common Standard_D4 VM size, the savings percentages are as follows –
- 1 year – 27%
- 3 year – 53%
- 5 year – Not currently offered for most resources
Purchasing and Applying Azure Reservations
Once you’ve identified which resources to reserve, follow these steps to purchase and apply your Azure Reservations:
Step 1: Navigate to the Reservations Page
In the Azure Portal, go to “All Services” and search for “Reservations.” Click on the “Reservations” service to enter the Reservations page.
Step 2: Decide on the Scope of Reservations
Purchased reservations have a defined scope, which can be configured to cover one subscription, multiple subscriptions or even a single Resource Group or Resource.
- Shared – The reservation discount is applied to eligible subscriptions within your billing context. For Enterprise Agreement customers, the billing context is all subscriptions in the EA enrollment. For Pay-As-You-Go customers, the billing context is all eligible subscriptions created by the account administrator. For Microsoft Customer Agreement, the billing context is the billing profile.
- Single subscription – The reservation discount is applied to the matching resources in the subscription you select.
- Single resource group – The reservation discount is applied only to the matching resources in the resource group you select.
Step 3: Select and Purchase a Reservation
- Click on “+ Add” to start a new reservation.
- Choose the type of resource you want to reserve (e.g. Virtual machine).
- Select the Scope for the reservation.
- Select the region, SKU (size and type), and the quantity of resources to reserve.
- Choose the term length (one-year or three-year normally).
- Review the pricing and click “Add to cart”.
- Provide each reservation with a meaningful name and choose whether to pay monthly or upfront.
- Select Next: Review + buy to proceed to the purchase screen.
- Click “Buy now” to complete the purchase.
Step 4: Apply the Reservation
Once purchased, the reservation is automatically applied to any matching resources. You don’t need to manually assign them to specific resources. Azure takes care of this for you, ensuring the most cost-effective application.
Managing and Modifying Your Reservations
Azure Reservations are flexible, allowing you to make adjustments if your needs change over time:
Exchange or Refund Reservations
If your needs change, Azure allows you to exchange your reservations for others of equal or greater value, or you can cancel and get a refund (with a limit of around $50,000 at the time of writing).
Monitor Reservation Utilization
You can use either Azure Cost Management + Billing or the Reservations pane itself to monitor the utilization of your reservations.
The Reservations pane shows Utilisation over the last day and 7-day periods as per the image below –
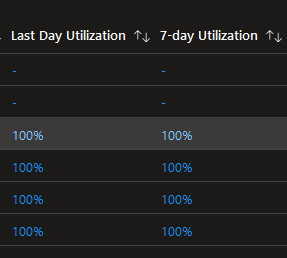
Whereas the Cost Analysis portal provides a handy Reservation view if you navigate to the All views tab which can show you a list of all Reservations, their current cost and the value of any unused reservation as per the image below –

Step 3: Reassign Reservations
If you have multiple subscriptions, you can reassign reservations to ensure that the savings are applied where they’re needed most. Simply go to the Reservations page, select the reservation, and choose to reassign it to a different subscription or resource group.
Conclusion
Applying Azure Reservations is a powerful way to reduce costs for your long-term Azure resources. By committing to one or three-year terms, you can lock in significant savings and optimize your cloud spending.


Leave a reply to How to Reduce your Azure SQL Database Costs – Sysadmin Central Cancel reply