
Have you noticed the “Preferred data location” field in Entra ID on a synced user and wondered how to use it? You might have clicked the edit button next to Settings, only to find yourself on a page where you can’t see or modify this field. The reason is that this setting needs to be configured on-premises within Active Directory (AD) and properly set up in Entra ID Connect to sync with your Entra environment.
In this short post, I’ll guide you through the exact steps to configure it.
The Solution
Step 1: Disable Entra ID Synchronization
Before making any changes to your on-premises AD schema, make sure to stop the Entra ID synchronization.
- Open PowerShell on the Synchronisation Service manager server.
- Disable the scheduler by running the PowerShell shown below –
Set-ADSyncScheduler -SyncCycleEnabled $false
- Open the Synchronisation Service Manager application and ensure there are no “in progress” jobs showing under the Operations tab, if there are, wait for them to complete before continuing.
Step 2: Configure the source attribute on the AD Connector schema
Now we need to ensure that the msDS-preferredDataLocation source attribute is enabled for syncing to Entra ID.
- In the Synchronization Service Manager, navigate to the Connectors tab.
- Select your Active Directory Domain Services connector and then select properties in the right-hand Actions menu.

- In the Properties window that appears, navigate to the Select Attributes tab and then check the Show All checkbox.
- Check the msDS-preferredDataLocation attribute and then click OK to confirm the addition of the attribute.

- Now select the Windows Azure Active Directory connector, and select Properties again to open the Properties window.
- Navigate to Select Attributes again and then ensure the Show All checkbox is checked. Then select the preferredDataLocation attribute and click OK to ensure the attribute is synced.

Step 3: Create an inbound synchronisation rule
Next, we need to configure an inbound synchronization rule that enables the selected on-premises attribute to sync with Entra ID.
- Open the Synchronization Rules Editor application and select “Add new rule” to create a new inbound rule.
- In the Description tab, enter the following information –
- Name – In from AD – User preferredDataLocation
- Connected System – Select your AD connector
- Connected System Object Type – user
- Metaverse Object Type – person
- Precedence – 1-99 (select an unused number between 1-99)
- Leave all other fields at their default values and click Next.
- Continue through to the Transformations tab then select Add transformation.
- Select preferredDataLocation as the target Attribute and msDS-preferredDataLocation as the Source then click Add.
Step 4: Create an outbound synchronisation rule
Next, we need to create an outbound synchronization rule that allows modifications to sync back to AD.
- Change the Direction dropdown in the Synchronization Rules Editor to Outbound then select Add new rule.
- In the Description tab, enter the following information –
- Name – Out to AAD – User preferredDataLocation
- Connected System – Select your Entra ID connector
- Connected System Object Type – user
- Metaverse Object Type – person
- Precedence – 1-99 (select an unused number between 1-99, this must be different to the inbound rule precedence)
- Leave all other fields at their default values and click Next.
- In the Scoping filter tab, select Add group and add the following 2 clauses –
- sourceObjectType EQUAL User
- cloudMastered NOTEQUAL True

- Continue through to the Transformations tab then select Add transformation.
- Select preferredDataLocation as the target Attribute and preferredDataLocation as the Source then click Add.
Step 5: Run full synchronisation
The Synchronization Service Manager will automatically schedule the necessary full synchronizations once the Sync Scheduler is re-enabled using the PowerShell script below. However, if you prefer to manually schedule them, you can follow the instructions provided in Step 7 at the link below.
Set-ADSyncScheduler -SyncCycleEnabled $true
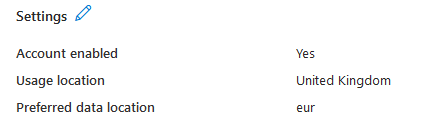
Once a sync has completed, the modified property will begin appearing on any synced users –


Leave a comment